It is exciting to capture the world from above. Drone photography gives a new perspective and opens up a world of possibilities. Euphoria becomes frustration, because taking quality aerial photos is a challenge. Reading and applying the information below gets you closer to mastering the secrets of drone photography. The article covers
- Drone options
- Camera basics
- Camera Settings
- Capturing Great Images
- Postproduction
- Combining and Merging HDR Images
1. Drone Options
Most drones are expensive and have fancy bells and whistles. it helps to have a general knowledge about drones and cameras before choosing a drone to use. There is a big difference between professional and hobby photography drones. A beginner toy drone costs between $30 to $90, while entry=level drones with cameras have a typical price tag that ranges from $350 to $500. Commercial drones cost more thatn $2000. The plans you have for the drone determine how much you will spend on them. DJI drones are among the most expensive. Here are six suggestions, listed in price from least to greatest.
A) Holy Stone HS110D FOV RC Drone

The Holy Stone model is a bargain pick, because it is less expensive and packed with features that help created high-quality imagery with an effortless experience. The wide angled lens offers images that are distortion-free and clear. It is designed with a headless mode that makes control easier. Other features include gesture control, gravity sensor and trajectory flight control, and voice control. The most significant downfall is the need to connect the battery inside the drone to charge it.
B) Holy Stone HS120D GPS Drone

The Holy Stone model here is simple to pilot and packed with convenient features. There are 1080p camera features that include Follow Me, Custom Path, and an auto-return feature. The GPS allows the return home if the power is low or the signal is lost. It is lightweight and easy to fly. The flight time is not as long as the others mentioned here.
C) Ruko F11 Foldable GPS Drone with 4K Camera

This is the best drone for beginners. It is a high-quality drone to use when beginners learn to fly. The drone is designed to offer stable and clear imagery. It is made of durable alloy brushless motors for powerful, quiet, and fast flight. The drone has 120°FOV lens to capture wide views. It has 30 minutes of power per battery. There is a compatible app to assist with flight. Sometimes the WiFi connection is spotty.
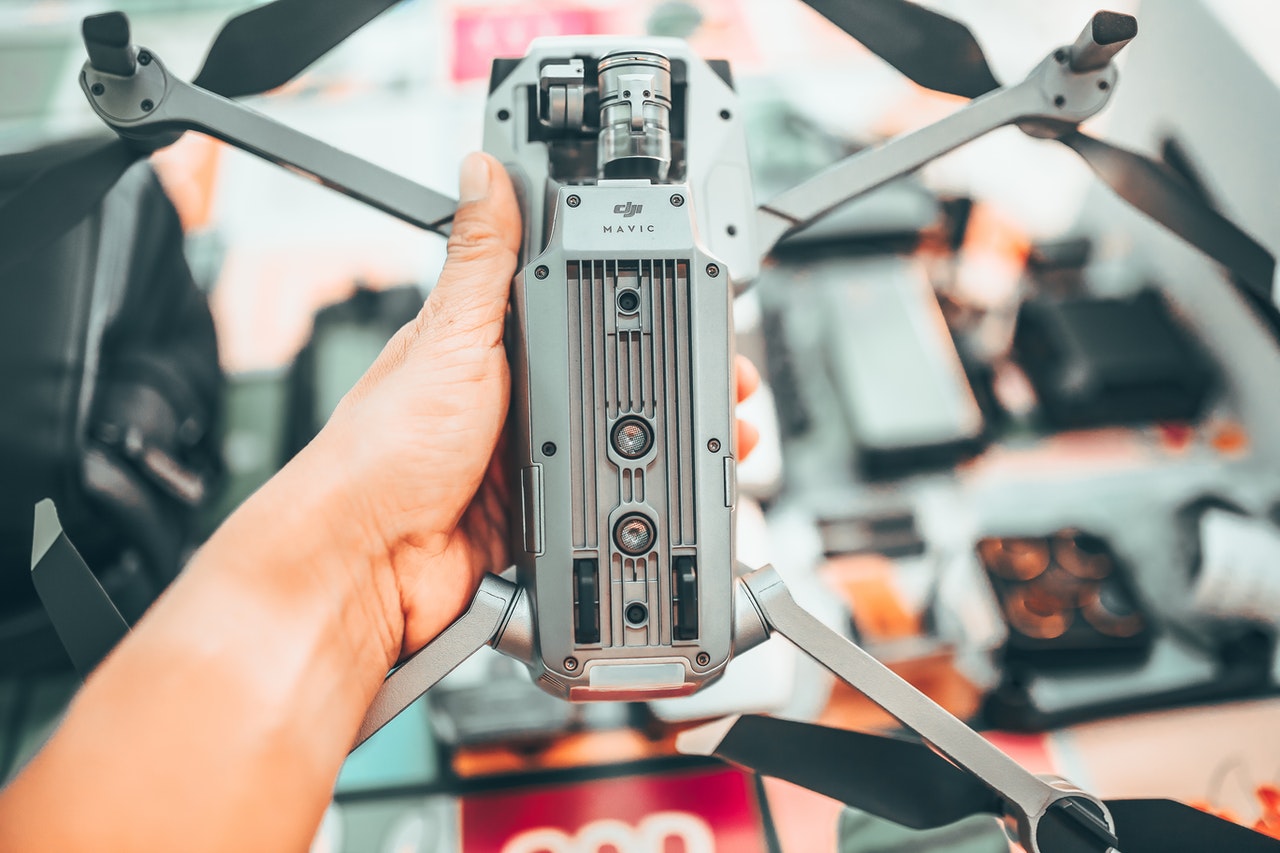
D) DJI Mavic Air 2

This is a popular drone that has impressive shooting modes and a powerful camera. It captures high-quality 4K/60fps videos and 48MP photos. There are intuitive functions that are excellent for aerial photography. It can fly for as long as 34 minutes. The drone senses obstacles in three directions and is easy to use. People who purchased the drone noted customer support is poor.
E) DJI Mavic 3

The sensor of the DJI Mavic 3 provides a 12.8-stop dynamic range. More shadow and highlight details are retained. Work done with the drone is upgraded to a professional level. The flight time for this drone is 46 minutes. Staying in the air longer and capturing more details allows getting all the shots you want on a single battery. A 03 Plus Transmission system provides smooth, stable live feeds. The drone returns home on an optimized, safe, and fast route. People who purchased it last year had to wait for some of the features to become available.
F) DJI Phantom 4 Pro

This drone is perfect for novice drone pilots and expert photographers. It takes smooth 20MP photos and 4K video. The battery life can last as long as 30 minutes. There is a wide range of photography settings. The drone is built with a steady camera that functions with a maximum 45 mph drone speed. It is easy to fly and actively avoids hazards. The drawback of this drone is the price tag.
2. Camera Basics for Beginners

High-resolution miniaturization and smaller yet more powerful lithium-ion batteries have broadened the imagination of video photographers. A camera equipped drone can capture images during flight with fantastic clarity that lasts for 20 minutes or longer.
Most drones of today are equipped with a camera. Beginners who want to use a camera need to understand some basics when searching for a camera to use with their drones. It is possible to add cameras like a GoPro, to a drone, but most drones have a camera system built-in.
Imaging Resolution
The technology that allows capturing still images and high-resolution videos on a smartphone makes it possible to attach a lightweight camera to a drone. 
The 720p, 1080p HD, and 4K Ultra HD are the most common resolution selections. A camera with these resolution selections is about the lowest resolution camera available. The option is affordable and meets many needs.
Capture Rate

Capture rate is the speed images are shown. A capture rate of 24fps means 24 distinct images are shown each second of a video. The speed tricks the brain into perceiving motion smoothly. It impacts the viewing experience and style of a video. Several factors go into choosing a capture rate. It depends on how realistic you desire a video to look or if you plan on using motion-blur effects or slow motion techniques.
Other Considerations Related to Cameras

The camera is part of the overall drone system. Consider how the variables work together for your specific desires and needs to make a wise purchasing decision. For instance, some cameras capture a maximum of 64 Gigabytes on a memory card. Other considerations include
- Live to stream
- Gimbals
- Batteries
Early drone cameras captured video on SD cards. The images were downloaded at the end of a flight. Newer drones feature a combination of live streaming and high-definition video. Video streams to a smartphone while it is being captured. This real-time or nearly real-time imaging increases flexibility. Some systems can live stream from four miles away.
A drone that features a camera mounted to a 360-degree gimbal is needed for ultimate shooting flexibility. It allows the camera to rotate in all directions when flying. The flight time offered by value-priced drones is seven to ten minutes.
A more elaborate system is needed to keep a drone aloft for 20 minutes or more. An investment in multiple batteries is recommended. The extra cost is one consideration that depends on matching the suitable drone to your needs. Major manufacturers offer various models that allow matching your need for camera capabilities.
Finding More Uses for a Drone

Aerial photography with drones is an exciting, new world for beginners. They likely find more uses for their drones than they anticipated. It is beneficial to have drones capable of use for various projects, such as high-resolution commercial real estate imagery or thermal mapping and imaging.
It is wise to invest in a drone with more range, battery power, and a higher resolution camera than you may think you need. Another option is to begin imaging with an entry-level system you plan to replace or use as a backup when you have a better idea of how far you can take video capturing.
3. Camera Settings
Before taking off, be comfortable with the following photography techniques to get the ultimate out of flight time. They make a flight more enjoyable when you are well-prepared. Knowing the tricks makes life easier after production and allows for quality images with higher resolution. These steps help avoid making mid-air changes and make a flight less hectic.
Image Format

It is suggested to shoot images in the JPG+RAW setting. The JPG format produces images having a low-profile size that look great. RAW files contain uncompressed data from a camera, making it ideal for enhancing and editing without losing quality. Using both formats offers the best of each—the great look of the smaller JPG files and the larger RAW files with higher quality.
Color and Exposure

The next considerations are color and exposure settings. Color settings are located under the camera icon, and exposure settings are under the aperture icon. Adjusting color settings makes JPG images look great.
Color styles and profiles add contrast and saturation to JPG images, making them more appealing visually. RAW photos are unaffected by color settings because they are added after taking the image. The sensor on the camera does not directly capture them. The color settings to use are
- Color: Normal/None or TrueColor
- Style: Standard
- White Balance: Aut0
You use a color profile when you shoot. Normal or TrueColor are recommended. The Normal color profile has high contrast and excellent saturation, making photos look beautiful. Images are sharp, eye-catching, and vibrant.
The level of saturation may be a little much for some people. Switching to TrueColor yields a color reproduction that is more true-to-life. TrueColor brings out details in high contrast scenes. You have the RAW image you can edit if you are unhappy with the JPG image color.
It is suggested to leave the Style set on Standard. Images do not need more saturation, contrast, or sharpness. You can enhance images with free editing software. White balance adjusts the image’s color temperature. Set the white balance on Auto because it does a great job and is one less thing to think about.
The recommendation for exposure is the automatic setting. Like white balance, the camera correctly exposes the image and is another thing you do not have to worry about. The ‘tap exposure’ feature automatically adjusts the exposure. Other settings, such as zebra stripe and the histogram, help ensure an image is exposed correctly.
Casual Flyer Camera Settings

These settings allow casual fliers to have great-looking footage from a Micro-SD card that requires no editing.
- Color: No or TrueColor
- Format: MP4
- Style: Normal
- Video Size: 4K, 30fps
- Video System Standard: NTSC
- White Balance: Auto
The footage coming off a drone will look beautiful, vibrant, and bright. No postproduction or editing is required. Files are saved directly from a drone and can be shared on favorite social media sites. The photos are ideal for Instagram, and YouTube videos are crisp and sharp. Even if the footage is viewed at home on a TV or computer, everything looks great.
For slightly more advanced filming and better-looking results, it is suggested to set a manual white balance and lock the exposure. White balance settings based on flight conditions help produce more consistent and accurate video footage.
The white balance does not change between shots, and colors look the same on all footage—a similar effect results from locking the exposure. Auto exposure adjusts while the drone records resulting in constant changes and shifts in brightness. Tapping on the subject being filmed and locking the exposure prevent constant adjustments and provide more professional-looking and consistent footage.
Professional Filmmaker Settings

The following settings are recommended for flat images with highlight and shadow details preserved that are perfect for postproduction and editing.
- Color: D-Log
- Format: .MP4
- Style: Custom, 0, -1, +1
- Video Size: 4K, 30fps
- Video System Standard: NTSC
- White Balance: Manual
The settings provide a flat image profile ideal for color grading and correction during postproduction overflow. Details on highlights and shadows are maintained, and the higher 4K bitrate video permits more editing without affecting quality.
Shooting with a 0 Sharpness in high-contrast environments results in soft images in which light parts are in focus and dark regions are out of focus. A +1 Sharpness setting fixes the problem. Sharper images are better for postproduction results, making the Style setting very important.
Framing

While framing is mainly based on personal preferences and creativity, some tools help compose images. It is recommended to enable the center point and grid lines that help align a subject along the grid lines that follow the rule of thirds or in the center. Because composition and framing are personal preferences, explore various compositions.
High Dynamic Range

HDR is the difference between the darkest shadows and lightest highlights in a photo. Some scenarios include shooting into the sun at sunrise or sunset. Regardless of the settings used, you cannot avoid completely black shadows or blown-out highlights. A solution is to take several photos with different exposures and compose them together for one evenly exposed image.
How to Shoot HDR
Set the drone for Manual shooting and taking RAW photos. There are a several options from which to choose. It depends on the amount of control over the final product you wish to have.
- Shooting in HDR mode
- Taking several bracketed photos with different exposures and processing them into HDR later
- Without moving the camera, taking several single-shot photos and manually changing the exposure between them
The simplest and easiest way to get quick HDR photos is to shoot in HDR mode. The camera automatically takes bracketed photos and combines them into one photo each time the shutter clicks. You have no control over the image processing and get one processed shot. Not every drone has this option.
With the AEB (Auto-Exposure Bracketing) setting, the camera takes three to five photos in quick succession. The exposure varies every time the shutter clicks. You process the images later and fine-tune them during processing. An issue with this option is not being able to change exposures that the camera takes. It automatically chooses to take a photo a step below or above the correctly exposed shot.
Taking several single-shot photos with a stationary camera allows deciding how much of a change there should be between images. It provides the most control—the time between photos increases when manually changing the exposure.
Chances of moving the camera increase, which may distort postproduction. That is typically only necessary if there is a vast difference between the highlights and shadows in a photo that the AEB cannot completely capture.
The AEB mode is recommended because it quickly captures several photos and eliminates between photo movement. In most lighting situations, you can get a range of exposure significant enough to expose the highlights and shadows correctly. The method gives a photographer enough control to get quality results and takes advantage of some automated functions of a drone that help eliminate human error.
White Balance

White balance is the cool or warm temperature of the colors of a photo. It is measured in Kelvin units ranging from approximately 1000 to 10,000. Lower numbers are cooler colors, and high numbers are warmer.
The goal is to set the balance to be as neutral as possible. A photo that is too warm is corrected by lowering the temperature, and one that is too cool is corrected by raising the temperature. The number values of lighting conditions are displayed in this chart.

- Sunrise/Sunset
- Morning/Evening Sun
- Daylight
- Cloudy Sky
- Clear Blue Sky
The light temperature from the sun changes drastically during the day,
Using Manual White Balance Instead of Auto

The temperature of all light sources is different. No two scenarios are identical. Automatic white balance gets close, but you can do better, particularly when shooting video. Panning across a landscape, lighting conditions change, and the Auto white balance corrects itself. Ideally, it should be kept consistent for the whole video. With manual white balance, the colors and tones of videos and photos can be fine-tuned and kept constant throughout the entire shoot.
Camera Settings for White Balance

To set the white balance to Auto, open the DJI app and ensure the camera is on Manual mode. There is a variety from which to choose. Most cameras and drones have automatic settings that include neon, incandescent, cloudy, sunny, and Auto.
They are an excellent place to start but are not precise. The ‘Custom’ setting allows choosing any temperature value. Use your grey card to set the white balance. It is a thick piece of paper in a specific shade of grey used to choose the color temperature.
Getting the neutrals white balance right means the entire photo will have the correct white balance. Use a white piece of paper if you do not have a grey card. Place either of them in front of the subject and point the drone at it.
The goal is to replicate the lighting when flying to be consistent during the entire shooting. Adjust the white balance by sliding the slider back and forth until the paper looks completely neutral with a grey card or perfectly white with the other. You are ready to fly and shoot.
Long Exposure
An unappreciated tactic of photography is prolonged exposure. Drone photographers can use it to add an artistic twist to impress clients. Long exposure uses longer exposure times to capture an exposed photo adequately. It is time the digital sensor is exposed to light, and the shutter is open. Long exposure is ideal for many shots taken by drone photographers of bodies of water, architecture, and landscapes.
Neutral Density Filters

A neutral density filter is required to take long exposure shots. They are like drone sunglasses that filter out light and allow longer exposures, even in bright sunlight. There are density filters available that produce clear images.
They slide over the camera, and friction keeps them in place. Apply and remove the filters when the drone is off to avoid damaging the gimbal. The density filter should be an ND 16 filter at the minimum. It reduces light for long exposure shots. An ND 32 or ND 64 filter allows capturing long exposure in broad daylight rather than closer to sunset.
Choosing the Right Settings

To get the long exposure effect, wait until near sunset before taking off the filter installed on a drone. Adjust the camera settings to ensure you are shooting in Manual within the DJI application by manually adjusting the shutter speed and ISO.
The ISO setting should be 100, and the shutter speed adjusted until an image appears on the screen. Shooting with the typical 1/60 of a second shutter speed yields an entirely dark image when using an ND 16 filter.
Gradually decreasing the speed may have to be set at one second to get an image. The recommended mode is JPG+RAW. Experiment with the shutter speed to find what looks best. A waterfall shot may require one to four shutter speeds for best results.
Take lots of images because the drone may drift in the wind and produce blurring photos. The drone should still capture the long exposure effect—experiment by shooting moving vehicles and attempting to do light writing.
These effects require an ND 32 or ND 64 filter to get shutter speeds of four to eight seconds. Drone pilots are not permitted to fly later than civil twilight, about a half-hour after sunset, without an FAA waiver.
4. Capturing Great Images in the Air

Getting beautiful cinematic drone footage can be challenging. Five simple cinematic drone shots can be executed that are worth trying and look great. They are the
- Flyover-Tilt-Down
- Fly-Up-Tilt-Down
- Low-to-Ground-Tilt-Up
- POI
- Pull-Away
The Flyover-Tilt-Down Shot looks fantastic and is excellent for showing off a location or property. The trick is to record in reverse when filming the shot. When you start above the subject and then fly backward and tilt up, you guarantee the shot was perfectly above the subject, and you do not miss your mark.
It starts by flying backward and slowly tilting the camera up, keeping the subject in the frame. Continue moving before tilting to the skyline. It is recommended to adjust the pitch speed of the gimbal to about ten for a smooth camera tilt.
Another simple shot is the Fly-Up-Tilt-Down Shot which looks excellent. It requires practice to execute but is easier if you adjust the gimbal pitch speed that controls how fast a camera tilts down or up. Like the Flyover-Tilt-Down Shot, a pitch speed of about ten results in a slower, smoother camera tilt. You are positioning the drone in front of the subject, flying up slowly, and reaching the top of the subject as you pull the pitch dial of the gimbal to tilt the camera down.
The Low-to-Ground Shot is epic. It is an excellent way of revealing a subject with lots of energy that looks great. Hover the drone as close to the ground as you feel comfortable doing. The drone appears to fly faster the closer to the ground you are.
Keep the camera facing down and start to fly forward. As you fly, gradually tilt the camera up to reveal the subject. A slower pitch speed is perfect for executing this shot. Getting the timing correct takes practice, but the effect looks stunning.
POI stands for Point of Interest. It is an intelligent DJI drone flight mode. It almost seems like you are cheating when using the automatic flight mode because the results are excellent drone footage. In POI mode, a drone slowly circles the subject while adjusting the angle of the camera to keep the subject in the frame. It is simple to do, and the footage is fantastic.
The Pull-Away Shot always looks great and is among the easiest to capture. Hover the drone in front of the subject and gradually pull back on the right stick and push the left stick up. The drone moves up and back and produces footage that looks great. Practice slower control stick movements to achieve more cinematic, smoother footage. You can go full throttle in either direction for faster shots.
Tripod Mode

The Tripod Mode is a versatile and extremely intelligent flight mode. It provides fine control of a drone by reducing the braking distance and limiting the maximum speed, which gives you more control of a drone.
This mode makes recording cinematic shots and smooth footage easy for various applications and projects. It can be used to film hyper lapses, time-lapses, commercial properties, real estate projects, and fly indoors.
What Tripods Do
The braking distance reduction and throttling of the maximum speed of flight enhance the control of a drone. The flight speed may be limited to 2.2 or 5.6 mph, depending on the drone. On some drones, the Tripod Mode engages a 3D Visioning System to aid in avoiding obstacles.
Five Best Tripod Mode Uses

Tripod Mode is beneficial in various applications due to its smooth motion and enhanced control. The five best uses are
- Obstacle avoidance
- Close to ground filming
- Commercial indoor flying projects
- Time lapse and hyper-lapse aerial filming
- Miscellaneous other things
Reduced control sensitivity and limited flight speeds in Tripod Mode give a drone more control to avoid tricky situation obstacles. It is conducive to filming residential real estate projects with bushes, trees, or other barriers.
Tripod Mode is fantastic for getting cinematic, smooth footage near the ground. It is perfect for showcasing lower angles of a property that some drone pilots do not consider. The three-axis gimbal stabilization and slower motion produce nice shots. It is excellent for mixing lower-angle shots with higher altitude clips. Flying close to the ground is fun, and the added control means avoiding telephone poles, trees, and other obstacles more easily.
Tripod Mode is an excellent way to capture the exterior of buildings and storefront locations. It is also ideal for flying indoors. Companies that wish to showcase an interior space, assembly-line process, or their machinery and equipment operation benefit from the Tripod Mode. The added control and slower movements make capturing smooth footage while the drone is at a safe distance from the machinery easy.
A smooth, stable Tripod Mode allows hitting record and flying in a single direction to create beautiful hyper-lapses and time-lapses that are visually stunning. It is fantastic to explore those types of videos using Tripod Mode.
The versatility and flexibility of Tripod Mode make it perfect for various applications and projects. Drone controls stay the same but move in a more controlled and slower fashion. The use of Tripod Mode is an excellent way of making drone footage cinematic, smooth, and slow and exploring creative new shots.
5. Postproduction
If you follow the steps mentioned above, postproduction is relatively simple. Even if photos do not always turn out perfect, photo editing has made postproduction more convenient and manageable. Below are techniques that will be helpful.
White Balance Correction

Shooting in RAW allows fixing white balance if it is not set before shooting. Sometimes manually adjusting before shooting still produces photos that are not ideal. Take a quick shot of the grey card or white paper before shooting to use as a reference to fine-tune during postproduction.
Photo Editing

White balance can be manually adjusted in Lightroom by moving sliders labeled ‘Tint’ and ‘Temp.’ Selecting the eyedropper tool then clicking on the part of a photo you want to be neutral is another way to adjust the white balance.
Click on the grey card or white paper photo, and you are set. Choose a pure white or grey portion of an image without the picture and sync those settings to the other photos to correct all the colors. Lightroom has automatic settings and – flash, fluorescent, tungsten, shade, cloudy, and daylight with specific tint and color values. The chart below may be helpful, but custom settings are typically best. 
Fisheye Distortion Elimination

Drones are taking over as the leading technology tool for aerial photography. Fisheye distortion can be a problem for optical clarity. The barrel effect happens after using a wide-angle lens on a drone that causes the view to be wider than the size of the image sensor.
Aerial photography fisheye distortion is not too complicated to correct with the right software. The technical explanation of the barrel effect or fisheye distortion is the field of view is squeezed to fit the image and causes straight lines in photos to appear curved or barrel shape. Fisheye is due to a wide-angle lens having a short focal length.
Corrective Software
Based on the corrective software used, the fisheye distortion can be solved.
A) Adobe Lightroom 

Adobe Lightroom is excellent software for editing aerial photographs taken by drones. It is a full-fledged photo editing tool that makes fisheye distortion easy to correct. Phots are imported and isolated where the barrel distortion is most problematic.
Click on ‘Develop’ in the menu and scroll to ‘Lens Correction.’ Enter the type of camera used in the profile section. Distortion problems are automatically corrected based on the camera selection. Some photos may require more tweaking, but Adobe Lightroom works on most horizontal and vertical objects in a photo.
B) GoPro Studio

Those who use a GoPro camera have the advantage of the GoPro Studio software. It is purchased separately but is as easy to use as Adobe Lightroom. The file comes directly from a GoPro camera when correcting photo fisheye distortion.
Once a photo is imported and converted in the program, you select ‘Advanced Settings,’ and a box saying ‘Remove Fisheye’ appears. All you do is click and press ‘OK’ to correct the distortion. You move a file to the Conversion List to convert and save the clip. It is among the most straightforward procedures, though you can find other editing software that does a more thorough job.
C) PTLens

Sometimes, big names are not the only software that provide quality photo editing results. The PTLens is a not-so-well-known small application that is an excellent source for fisheye distortion correction without hassle.
It is simple to download and install and is available in Mac and Windows versions. It provides a digital interface for fixing the problem with various sliders and controllers. Some photographers prefer this method of fixing barrel distortions to relying upon one-click quick fixes. One-click fixes fail when aerial photography is more complex. Manual controls assure each vertical or horizontal line of a photo is genuinely straight for a more accurate image.
Drone Photos that Pop

Editing drone and regular ground photos are very similar. The difference is in the subject matter. Commercial aerial images are created for marketing purposes that have a unique set of requirements. Often, drone photos have no human subjects, which allows a little more creativity with toning and colors. When photographers retouch people, they must look human and cannot go overboard. Landscapes should not look unnatural, but a photographer has some freedom with toning and colors.
Cinema Settings

Before postproduction, make sure you shoot with the most appropriate camera settings. Postproduction cannot save a terrible aerial photo that is technically incorrect. Always shoot RAW and in manual. Shooting in RAW provides more photo information and allows more detailed editing. Set the if you want both.
Lightroom is highly recommended for most photo editing. It is an excellent resource for editing a large batch of photos because it is easy to synchronize them in the same settings. To your satisfaction, one image is edited, then copy and paste the same setting on other photos with similar lighting scenarios.
- Import the photos to Lightroom
- Select all the photos
- Drag them to the icon for Lightroom
- Click File
- Click Import Photos
- Click Video
Photos are now ready to be edited.
File Correction

Scroll to the profile corrections and check the ‘Enable Profile Corrections’ and ‘Remove Chromatic Aberration boxes. The vignetting, lens distortion, and chromatic aberration that may occur while flying is removed.
If shot in RAW, each photo has data that tells Lightroom the type of lens used. Lightroom automatically chooses the lens correction needed, or you could select ‘Manual’ and decide how much to correct.
Basic Corrections

The fundamental photo characteristics changed with basic corrections include saturation, vibrance, shadows, highlights, contrast, exposure, tine, and temperature. There are times when more than one setting is ‘correct.’
The artistic license comes into play when the same photo can have lightened shadows that provide a cool tone, and the subject is clearly seen or a warmer, moodier tone where the subject is more of a silhouette. Neither is necessarily right or wrong. Feel free to play to figure out what you want the photo to look like.
Color Tones

Color toning fine-tunes the colors of a photo. There is no general rule for all images; the hue, saturation, and luminance depend on the image. Some aerial photos require minimal color toning, and others need a lot. Your style affects the color toning used. Some photographers prefer pictures to be realistic as possible; others exercise artistic license and manipulate photos. After the basic edits, scroll down the HSL panel and move the slider back and forth to get the desired results.
Graduated Filter Tool

Sometimes only part of a photo needs adjustments corrected with a graduated filter tool to edit. It is found under the Histogram – the fourth icon from the left. Select the icon and click and drag it to the area of the photo to be edited. When the sliders are moved back and forth, only the selected portion of the image is changed.
Copying and Pasting

It can be overwhelming to open an entire camera roll and extremely time-consuming to edit each photo individually. Lightroom makes it simple to edit hundreds of images quickly. After completely editing one photo, select it first, then the other images you want to look like it, and click ‘Sync.’
JPEG Export

You can convert the entire group of photos to JPEGs by clicking File, then ‘Export.’ You can also use Command + Shift + E. A dialog box opens to select the location to save the photographs and name them. Be sure to scroll to ‘File Settings and choose JPEG.
Take Into a Patch Tool

When the photos are JPEGs, you can do any other editing in Lightroom. Photoshop is recommended for taking out drone propellers that appear in photographs, smoothing out clouds, or removing anything you do not want in a photo.
Use the patch tool by drawing around the object you want to remove. Click and drag it to the part you want to use as a replacement. Photoshop blends them and fills them to make a smooth appearance. Photos are done individually in Photoshop. Spend time perfecting the final selections. You have a lot of editing freedom that produces excellent drone photos. Experiment and have fun with the process.
6. Combining and Merging HDR Images
There are many ways to process photos into a High Dynamic Range photo. The most common programs are Lightroom and Photoshop. Other programs are expensive and require a subscription. Some programs that claim to create HDR imagery add only a filter to a photo and are not as reliable as Lightroom and Photoshop.
Lightroom

Import the photos to be combined into Lightroom. Select all of them and right-click. Choose ‘Photo Merge’ and ‘HDR’ to get a dialog box. There are not a lot of options, but a couple are noteworthy. The ‘Auto-Align’ corrects small camera movements between photos. You can choose the best color tone by toggling the ‘Auto-Tone’ option off and on. If you are not pleased with the Lightroom results, further editing is possible after processing the photo.
There are some options for deghosting that correct movement of a subject in a photo. The deghosting amount chosen depends on the movement amount in a picture. After deciding on a setting, click ‘Merge,’ located at the bottom right corner. Lightroom adds the new HDR image to the end of a camera roll.
Photoshop

The process for merging Photoshop HDR photos is very similar. Open the images in Camera RAW and select the photos you want to merge by right clicks. Choose ‘Merge to HDR.’ A dialog box opens with options to align and deghost photos. After choosing the deghosting and alignment settings, click ‘Merge’ and decide where to save the new image.
The Process for Large Photo Quantities

Photoshop produces precise HDR photos and fine-tunes them. The process of editing each photo is time-consuming. Lightroom is advantageous because it can treat ‘stacks’ of pictures instead of individual images.
After processing one, you can copy and paste the setting on the other photos in the stack. Import all the images into Lightroom, select them, and do a right-click on one. Choose ‘Stacking’ and ‘Auto-stack by Capture Time.’
A dialog box pops up asking how much time between stacks. Move the slider to the number of expected stacks or the number of photos taken. Auto-stack is pretty accurate for images shot in AEB mode because bracketed photos are taken quickly, one after another.
Choose ‘Stacking’ and ‘Collapse All Stacks’ for easier viewing when the stacks are arranged. Each stack will have a small white number in the upper left corner with the number of photos in the stack. Make the first HDR as you usually would. Then choose the second stack and paste the settings by pressing CTRL + Shift + H. Repeat on all the stacks, and Lightroom processes them simultaneously and adds them to the end of the camera strip, where they can be edited as usual.